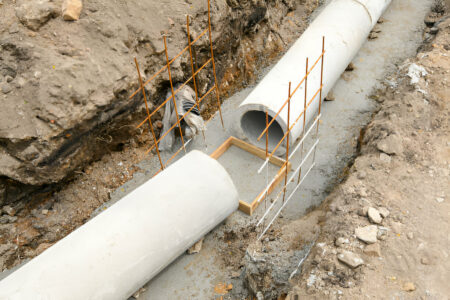
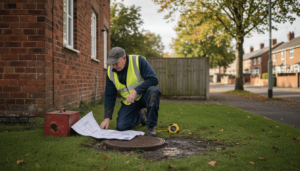
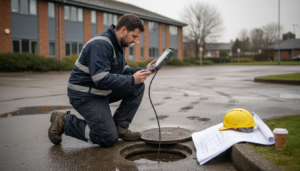
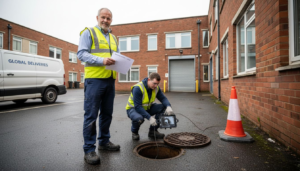
Installing a land drain might sound like a daunting task, but with the right guidance, it can be a straightforward process. In this article, we’ll walk you through everything you need to know about land drain installation, from understanding its importance to executing the installation step-by-step. Whether you’re a DIY enthusiast or considering hiring a professional, this guide will equip you with the knowledge you need.
Understanding Land Drainage
Definition and Purpose
Land drainage is the process of removing excess surface and sub-surface water from an area. Proper drainage is essential for maintaining soil health, preventing waterlogging, and ensuring that plants and structures remain unaffected by excess moisture.
Common Problems Caused by Poor Drainage
Poor drainage can lead to a host of problems, including waterlogged soil, plant root rot, and damage to foundations and structures. It can also create breeding grounds for pests and negatively impact the usability of your land.
Types of Land Drains
Surface Drains
Surface drains are designed to remove water from the surface of the ground. They are typically used in areas with poor natural drainage or where there is a need to quickly remove standing water.
French Drains
French drains consist of a perforated pipe surrounded by gravel, which helps to redirect water away from problem areas. They are commonly used in gardens and landscapes to prevent waterlogging.
Trench Drains
Trench drains are channels with a grated cover that are installed in areas where water needs to be quickly removed, such as driveways and patios. They are highly effective for managing surface water.
Planning Your Land Drain Installation
Assessing Your Land
Before you start, it’s crucial to assess your land to identify drainage problems and determine the best solution. Look for areas where water tends to pool or where the soil remains soggy for extended periods.
Identifying Drainage Problems
Understanding the specific drainage issues you’re facing will help you choose the right type of drain. Are you dealing with surface water, groundwater, or both? Each type of problem may require a different solution.
Choosing the Right Type of Drain
Based on your assessment, decide which type of drain is best suited for your needs. Surface drains are ideal for removing standing water, while French drains are better for addressing subsurface water issues.
Tools and Materials Needed
Essential Tools
- Shovel or trenching tool
- Measuring tape
- Level
- Pipe cutter
Materials Required
- Perforated drainage pipe
- Gravel or aggregate
- Geotextile fabric
- Connector fittings
Step-by-Step Guide to Installing Land Drains
Preparing the Site
Clearing the Area
Remove any vegetation, debris, or obstacles from the area where the drain will be installed. This ensures a clear path for your trench and helps prevent blockages.
Marking the Drainage Path
Use a garden hose or string to mark the path of the drain. This will serve as a guide when digging the trench and help ensure your drain is installed in the correct location.
Digging the Trench
Measuring Depth and Width
The depth and width of your trench will depend on the type of drain you’re installing. Generally, a trench should be about 18-24 inches deep and 12 inches wide.
Proper Trench Digging Techniques
Use a shovel or trenching tool to dig the trench. Ensure that the bottom of the trench slopes gently to facilitate water flow. A slope of about 1% (1 foot drop per 100 feet of length) is usually sufficient.
Installing the Drainage Pipe
Laying the Pipe Correctly
Place the perforated pipe in the trench with the holes facing down. This allows water to enter the pipe from the bottom and flow out the other end.
Ensuring Proper Slope
Check the slope of the pipe using a level. Adjust as needed to maintain a consistent slope, ensuring efficient water flow.
Backfilling the Trench
Adding Gravel or Aggregate
Fill the trench with gravel or aggregate, covering the pipe completely. This helps to filter the water and prevent soil from clogging the pipe.
Covering with Soil
Finally, cover the gravel with soil, leveling it with the surrounding ground. You can also plant grass or other vegetation to help stabilize the soil and improve aesthetics.
Maintaining Your Land Drain
Regular Inspections
Periodically inspect your land drain to ensure it is functioning properly. Look for signs of blockages or damage to the pipe.
Cleaning and Clearing Blockages
If you notice any blockages, use a garden hose or plumber’s snake to clear them. Regular cleaning will help maintain optimal performance.
Seasonal Maintenance Tips
Perform maintenance tasks like clearing leaves and debris from the drain during the fall and after heavy storms. This will help prevent blockages and ensure efficient water flow year-round.
Benefits of Land Drain Installation
Improved Soil Health
Proper drainage prevents waterlogging, which can suffocate plant roots and reduce soil fertility. Well-drained soil promotes healthier plant growth.
Prevention of Waterlogging
By redirecting excess water away from problem areas, land drains prevent waterlogging and the associated problems, such as root rot and soil erosion.
Enhanced Plant Growth
Healthy, well-drained soil supports robust plant growth, resulting in a more vibrant and productive garden or landscape.
Common Mistakes to Avoid
Incorrect Pipe Installation
Ensure that the perforated pipe is installed with the holes facing down and that it maintains a consistent slope. Incorrect installation can lead to poor drainage and blockages.
Inadequate Slope
A trench with an insufficient slope will not allow water to flow properly. Be diligent in measuring and maintaining the correct slope during installation.
Using the Wrong Materials
Choose high-quality materials, such as perforated pipe and appropriate gravel, to ensure the longevity and effectiveness of your land drain.
Cost of Land Drain Installation
Factors Affecting Cost
Several factors can influence the cost of land drain installation, including the size of the area, type of drain, and cost of materials and labor.
Average Cost Estimates
On average, you can expect to spend between $10 and $30 per linear foot for a professionally installed land drain. DIY projects may be less expensive but require more time and effort.
DIY vs. Professional Installation
Pros and Cons of DIY
DIY installation can save money and provide a sense of accomplishment. However, it requires time, effort, and a certain level of skill to ensure proper installation.
When to Hire a Professional
Consider hiring a professional if you’re dealing with a large area, complex drainage issues, or if you’re not confident in your ability to complete the project successfully.
Conclusion!!
Installing a land drain is an essential step for maintaining the health and usability of your land. Whether you’re facing waterlogging issues, looking to improve soil health, or simply want to enhance the overall appearance of your landscape, a well-planned and properly installed land drain can make a significant difference. By understanding the types of drains available, planning your installation carefully, and following best practices, you can ensure effective drainage and long-lasting benefits.
