When it comes to effective water management, especially in areas prone to heavy rainfall or poor drainage, a rubble soakaway can be a game-changer. But what exactly is a rubble soakaway, and why should you consider installing one? Let’s dive into this comprehensive guide to understand everything about rubble soakaways.
Understanding Rubble Soakaways
Definition and Function
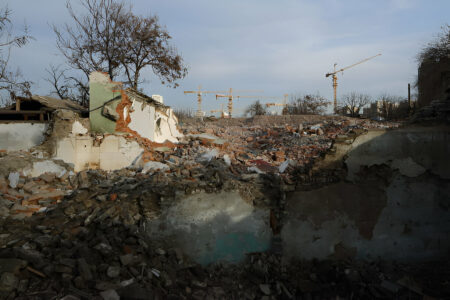
A rubble soakaway is a simple yet efficient drainage system that involves digging a pit and filling it with rubble, such as broken bricks, stones, or gravel. The primary function of a rubble soakaway is to manage excess water by allowing it to percolate slowly into the ground, preventing surface water accumulation and reducing the risk of flooding.
Historical Context
Historically, soakaways have been used for centuries as a natural method of water drainage. Before the advent of modern plumbing systems, communities relied on soakaways to manage wastewater and rainwater, showcasing their timeless effectiveness.
Benefits of Using a Rubble Soakaway
Efficient Water Drainage
One of the main advantages of a rubble soakaway is its ability to efficiently manage water drainage. By allowing water to seep into the ground, it helps prevent waterlogging and maintains soil integrity.
Preventing Flooding
Rubble soakaways play a crucial role in flood prevention. By diverting excess rainwater away from surface areas, they reduce the risk of flooding in residential and commercial properties.
Cost-Effective Solution
Compared to other drainage systems, rubble soakaways are relatively inexpensive. The materials required are often readily available, and the installation process is straightforward, making it a budget-friendly option.
Materials Needed for a Rubble Soakaway
Types of Rubble
The primary material for a rubble soakaway is, unsurprisingly, rubble. This can include broken bricks, stones, and gravel. It’s essential to use clean, inert materials that won’t decompose or leach harmful substances into the soil.
Additional Materials
In addition to rubble, you might need:
- Geotextile fabric to line the pit and prevent soil clogging
- A perforated pipe for enhanced water distribution (optional)
- Shovels and digging equipment
Planning Your Rubble Soakaway
Assessing the Site
Before you start digging, assess your site to determine the best location for the soakaway. Avoid areas close to buildings or foundations to prevent structural damage.
Calculating the Size and Depth
The size and depth of your soakaway depend on the amount of water you need to manage. A general rule of thumb is to ensure the pit is deep enough to handle the volume of water expected during heavy rainfall.
Step-by-Step Guide to Building a Rubble Soakaway
Preparing the Site
Clear the area of any debris and vegetation. Mark the dimensions of your soakaway pit using stakes and string.
Excavation Process
Dig the pit to your calculated dimensions. Ensure the sides are stable and the bottom is level.
Lining the Pit
Line the pit with geotextile fabric to prevent soil from clogging the rubble. This step is crucial for maintaining the soakaway’s efficiency over time.
Filling with Rubble
Fill the pit with your chosen rubble material. Arrange the rubble in layers, ensuring an even distribution.
Covering and Finishing
Once the pit is filled, cover it with a layer of geotextile fabric and then with soil or turf. This helps blend the soakaway into the surrounding landscape.
Maintenance of Rubble Soakaways
Regular Inspections
Inspect your soakaway periodically to ensure it’s functioning correctly. Look for signs of surface water accumulation or unusual sogginess in the surrounding area.
Cleaning Tips
Remove any debris or sediment that may have collected on the surface. If necessary, flush the soakaway with water to clear any blockages.
Common Problems and Solutions
Poor Drainage
If your soakaway isn’t draining water effectively, check for blockages or compaction of the rubble. Ensure the geotextile fabric is intact and not clogged.
Collapse of Soakaway
A collapsed soakaway usually indicates improper construction or inadequate support. Reinforce the sides with additional geotextile fabric and ensure the rubble is compacted correctly.
Environmental Impact of Rubble Soakaways
Sustainable Practices
Rubble soakaways are environmentally friendly as they use natural materials and promote groundwater recharge. They help maintain the natural water cycle, reducing the strain on municipal drainage systems.
Benefits to Local Ecosystems
By managing water runoff, rubble soakaways help prevent soil erosion and protect local water bodies from sedimentation and pollution.
Comparing Rubble Soakaways with Other Drainage Solutions
Traditional Soakaways
Traditional soakaways are similar to rubble soakaways but may use a variety of materials, including plastic crates or gravel. Rubble soakaways are often more cost-effective and easier to construct.
Perforated Pipe Systems
Perforated pipe systems involve laying pipes with small holes to distribute water evenly underground. While effective, they can be more expensive and complex to install compared to rubble soakaways.
Modern Drainage Systems
Modern drainage systems, such as stormwater management systems, offer advanced solutions for water drainage but come with higher costs and maintenance requirements.
Case Studies of Successful Rubble Soakaway Installations
Residential Installations
In a suburban neighborhood, a homeowner installed a rubble soakaway to manage rainwater runoff from their roof. The system effectively prevented flooding in their basement and improved their garden’s health.
Commercial Projects
A commercial property faced frequent parking lot flooding. By installing multiple rubble soakaways, they managed to eliminate surface water issues and enhanced their site’s overall drainage capacity.
Cost Analysis of Rubble Soakaway Installation
Material Costs
The cost of rubble varies based on availability, but it is generally inexpensive. Additional materials like geotextile fabric are also budget-friendly.
Labor Costs
If you’re handy with tools, a DIY installation can save labor costs. Hiring a professional may increase costs but ensures proper installation and longevity.
Long-Term Savings
Investing in a rubble soakaway can save money in the long run by reducing water damage and maintenance costs associated with flooding.
DIY vs. Professional Installation
Pros and Cons of DIY
DIY installation is cost-effective and gives you control over the project. However, it requires time, effort, and some technical know-how.
When to Hire a Professional
If you’re unsure about the installation process or dealing with a large-scale project, hiring a professional ensures the job is done right and meets local regulations.
Conclusion!!
Rubble soakaways offer an effective and sustainable solution for managing excess water, preventing flooding, and promoting groundwater recharge. They are cost-effective, relatively easy to install, and environmentally friendly. Whether you’re a homeowner looking to solve a drainage issue or a commercial property owner seeking a long-term solution, a rubble soakaway can be a practical choice.
