Trench drains are an essential solution for managing surface water and preventing flooding in various areas such as driveways, patios, and around pools. If you’ve ever experienced standing water issues, you know how important a properly installed trench drain can be. In this guide, we’ll walk you through the trench drain installation process step-by-step, ensuring you have all the information you need for a successful project.
Understanding Trench Drains
Definition and Purpose
A trench drain, also known as a channel drain, is a linear drainage system designed to collect and direct surface water away from a specific area. This helps prevent water accumulation that can lead to property damage and safety hazards.
Common Applications
Trench drains are commonly used in driveways, garage entrances, patios, pool decks, and industrial areas. They are ideal for any location where surface water needs to be efficiently managed.
Types of Trench Drains
Polymer Concrete Trench Drains
These are durable and resistant to chemicals, making them suitable for industrial and commercial applications. They offer a long lifespan and are capable of handling heavy loads.
Plastic Trench Drains
Lightweight and easy to install, plastic trench drains are perfect for residential applications. They are also cost-effective and corrosion-resistant.
Stainless Steel Trench Drains
Best suited for areas requiring high sanitation standards, such as kitchens and food processing facilities. They are resistant to corrosion and easy to clean.
Planning Your Trench Drain Installation
Assessing the Area
Begin by assessing the area where you plan to install the trench drain. Identify the source of the water and determine the best location for the drain to ensure optimal water collection and flow.
Designing the Drainage System
Create a plan that includes the layout of the trench drain, the type of materials needed, and the overall dimensions of the system. Ensure that the design accommodates the volume of water you expect to manage.
Permits and Regulations
Check with your local authorities to determine if you need any permits for the installation. Ensure that your plan complies with local building codes and regulations.
Step-by-Step Guide to Installing Trench Drains
Preparing the Site
Marking the Trench Path
Use a chalk line or spray paint to mark the path where the trench drain will be installed. This will serve as a guide during excavation.
Clearing the Area
Remove any debris, plants, or obstacles from the marked area to ensure a clear workspace.
Excavating the Trench
Measuring Depth and Width
The trench should be wide enough to accommodate the drain channel and deep enough to allow for a gravel base and concrete bedding. Typically, a depth of 8-12 inches is sufficient.
Digging the Trench
Use a shovel or trenching tool to excavate the trench along the marked path. Ensure that the trench has a slight slope (approximately 1% grade) to facilitate water flow toward the outlet.
Installing the Trench Drain
Laying the Gravel Base
Place a layer of gravel at the bottom of the trench. This helps with drainage and provides a stable base for the trench drain.
Positioning the Trench Drain Channel
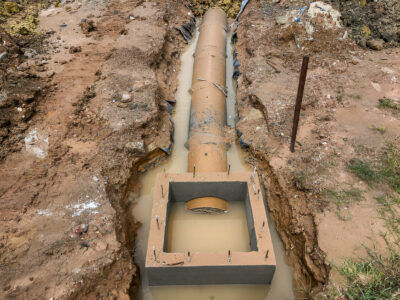
Set the trench drain channel on top of the gravel base. Ensure that it is level and properly aligned with the slope. Connect the sections of the channel if your drain system requires multiple pieces.
Connecting to the Drainage Pipe
Attach the outlet of the trench drain to a PVC or corrugated drain pipe. This pipe will carry the collected water to a suitable drainage point, such as a storm sewer or a dry well.
Securing the Trench Drain
Pouring the Concrete Bedding
Mix and pour concrete around the trench drain channel to secure it in place. Ensure that the concrete is evenly distributed and smoothed out using a trowel.
Leveling and Finishing
Use a level to check that the trench drain is correctly positioned and adjust as necessary. Allow the concrete to cure according to the manufacturer’s instructions.
Installing the Grates
Once the concrete has cured, place the grates on top of the trench drain channel. Secure them according to the manufacturer’s guidelines, ensuring they are flush with the surrounding surface.
Maintaining Your Trench Drain
Regular Inspections
Periodically inspect your trench drain to ensure it is functioning correctly. Check for any signs of blockages or damage to the channel and grates.
Cleaning and Clearing Blockages
Remove debris, leaves, and dirt from the grates and channel regularly. Use a hose or pressure washer to clear any blockages and ensure smooth water flow.
Seasonal Maintenance Tips
Before and after heavy rainfall or storms, inspect and clean the trench drain to prevent clogs. In colder climates, ensure the drain is free of ice and snow.
Benefits of Trench Drain Installation
Prevents Flooding
Trench drains effectively manage surface water, reducing the risk of flooding and water damage to structures.
Improves Safety
By preventing standing water, trench drains reduce the risk of slips and falls, making outdoor areas safer for pedestrians.
Enhances Property Value
A well-installed trench drain system can enhance the value of your property by improving drainage and reducing the likelihood of water-related issues.
Common Mistakes to Avoid
Improper Slope
Ensure the trench has a consistent slope to facilitate water flow. An incorrect slope can lead to water pooling and ineffective drainage.
Inadequate Support
Failing to secure the trench drain channel with concrete can result in shifting and damage over time. Proper support is essential for long-term performance.
Incorrect Grate Installation
Ensure grates are installed correctly and securely to prevent them from becoming dislodged. Improper installation can compromise the drain’s effectiveness.
DIY vs. Professional Installation
Pros and Cons of DIY
DIY installation can save money and provide a sense of accomplishment. However, it requires time, effort, and a certain level of skill to ensure proper installation.
When to Hire a Professional
Consider hiring a professional if you have a large area to cover, complex drainage issues, or if you’re not confident in your ability to complete the project successfully.
Environmental Considerations
Sustainable Drainage Solutions
Opt for sustainable drainage solutions, such as permeable surfaces and rain gardens, to reduce environmental impact and promote water conservation.
Environmental Impact
Be mindful of the potential environmental impact of your trench drain installation. Ensure that your drainage system directs water to appropriate outlets to prevent erosion and water contamination.
Conclusion!!
Trench drain installation is a practical and effective solution for managing surface water and preventing flooding. By understanding the types of trench drains, planning your installation carefully, and following best practices, you can ensure a successful project. Regular maintenance will keep your trench drain functioning optimally for years to come. Whether you choose to tackle the project yourself or hire a professional, the investment in a proper trench drain system is one that will pay off in the long run.
