Sorting out drainage on your property can feel confusing when rules keep shifting from one local authority to another across Southern England. The right drainage system protects your home and meets strict safety and environmental requirements enforced by councils, the Environment Agency, and other authorities. This step by step guide unpacks the full drainage installation workflow, explaining how to assess site needs, comply with legal standards, and avoid costly mistakes before any ground is broken.
Table of Contents
- Step 1: Assess Site Requirements And Compliance
- Step 2: Prepare Area And Gather Essential Materials
- Step 3: Install Drainage Infrastructure Efficiently
- Step 4: Verify Performance With Thorough Testing
- Step 5: Complete Finishing Touches And Clean Up
Quick Summary
| Key Point | Explanation |
|---|---|
| 1. Understand local regulations | Identify the specific drainage regulations and permits for your location to avoid legal issues and costly mistakes. |
| 2. Gather necessary materials early | Collect and organise all required materials before starting the project to prevent delays and ensure a smooth installation. |
| 3. Establish proper grades for drainage | Ensure pipes are sloped correctly to facilitate proper water flow and avoid pooling, which can lead to system failure. |
| 4. Conduct thorough system testing | Test the drainage system for leaks and adequate flow before sealing everything to confirm functionality and compliance. |
| 5. Complete site restoration carefully | After installation, clean up and restore the site to ensure proper water flow and prevent future maintenance issues. |
Step 1: Assess site requirements and compliance
Before you break ground on your drainage project, you need to understand what rules apply to your specific property and location. This step determines whether your installation will function properly and legally. Getting it right here saves costly mistakes later.
Start by identifying your site’s regulatory obligations. Different areas of Southern England have different requirements based on local authority guidelines, environmental zones, and development type. Your property might fall under specific flood risk designations, protected water areas, or conservation zones that all affect your drainage design.
Check what permits and approvals you’ll need. Most drainage installations in Southern England require building regulation approval and sometimes planning permission. Contact your local building control office early—they’ll tell you exactly what documentation and specifications they need from you.
Understand the legal framework governing your project. Drainage engineering regulations ensure designs comply with environmental protections, public health standards, and structural safety requirements. You’ll need to demonstrate that your system won’t cause flooding, pollution, or harm to neighbouring properties.
Review the national standards for surface water drainage systems if your project involves surface water management. These standards emphasize proper runoff management, system maintenance planning, and environmental compliance from the design phase onwards.
Gather key information about your site:
- Soil type and drainage characteristics
- Ground water table depth and seasonal variations
- Existing underground services (pipes, cables, utilities)
- Topography and gradient of your land
- Proximity to watercourses or protected areas
- Any history of flooding on the property
Compliance isn’t optional—it protects your investment and prevents expensive enforcement action or system failure down the line.
Once you’ve mapped out these requirements, you’ll have a clear picture of what your drainage system must achieve. This assessment forms the foundation for every decision you make next.
To clarify the types of site compliance affecting drainage projects in Southern England, see this table:
| Compliance Area | Impact on Design | Authority Involved |
|---|---|---|
| Flood Risk Zones | Enhanced drainage, flood resistance | Local Council, Environment Agency |
| Conservation Zones | Eco-friendly materials and layouts | Conservation Authority |
| Protected Water Areas | Pollution controls, discharge monitoring | Water Authority |
| Building Regulations | Safety, durability, system sizing | Building Control Office |
| Surface Water Standards | Runoff management, maintenance planning | National Agencies |
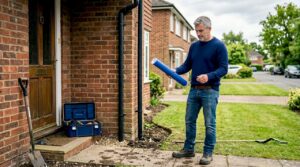
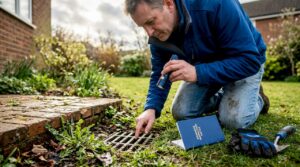
Pro tip: Request a CCTV survey of any existing drainage if available before planning your new system, as this reveals actual ground conditions and helps avoid costly conflicts with buried infrastructure.
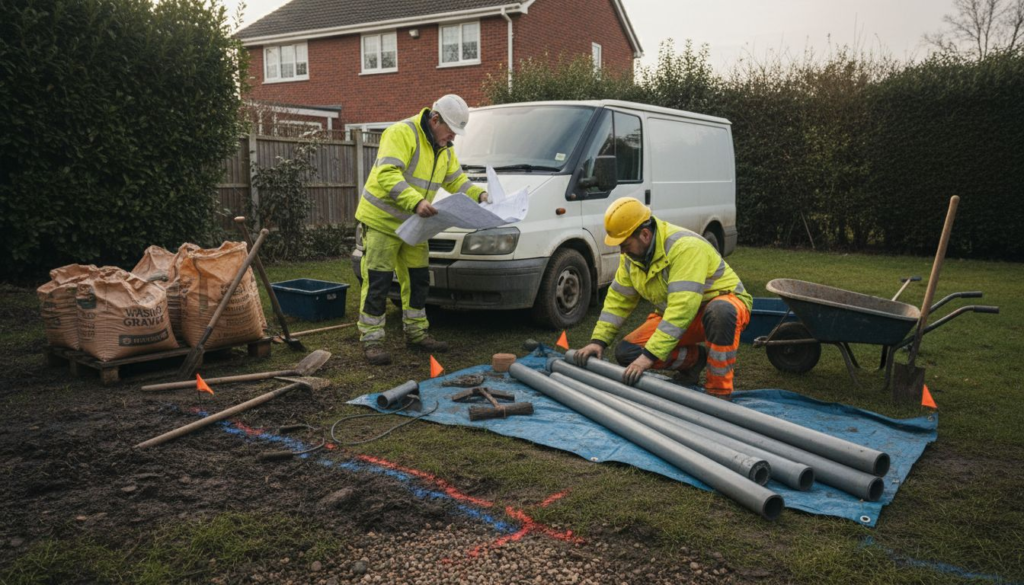
Step 2: Prepare area and gather essential materials
With your site requirements understood, it’s time to physically prepare the area and collect everything you’ll need. This preparation phase prevents delays and ensures your installation runs smoothly without scrambling for missing items halfway through.
Start by surveying and marking your work area. Use your drainage plan to identify where pipes will run, where excavation will occur, and where materials will be stored. Mark out utility routes with paint or flags to avoid accidentally hitting water mains, gas lines, or electricity cables during digging.
Confirm soil conditions on the ground. Your initial assessment identified soil type, but now you’re verifying it matches your expectations before work begins. Different soil types affect drainage speed and pipe bedding requirements, so spot checks here prevent design adjustments mid-project.
Gather all materials according to your drainage design. Selecting appropriate materials and tools ensures compatibility with your site conditions and system specifications. You’ll typically need pipes, connectors, sealing compounds, and bedding materials like gravel or sand.
Essential materials for most projects include:
- Drainage pipes (diameter and material per your design)
- Connectors, bends, and junctions matching pipe specifications
- Bedding materials such as gravel, sand, or engineered bedding
- Joint sealing compounds and adhesives
- Inspection chamber components if required
- Geotextile fabric for soil separation
Gather your tools and equipment before starting. Effective pre-installation preparation requires selecting machinery and tools consistent with your drainage design and site conditions. Basic hand tools include shovels, levels, tape measures, and pipe cutters. Larger projects may need mechanical diggers or compaction equipment.
Compare common drainage pipe material choices and their typical use cases:
| Pipe Material | Best For | Durability | Typical Applications |
|---|---|---|---|
| UPVC | Standard residential projects | High | Surface and foul water |
| Clay | Conservation or heritage projects | Very high | Major public or protected sites |
| Concrete | Large capacity systems | Excellent | Industrial or public networks |
| HDPE | Flexible ground conditions | Moderate | Difficult terrain, temporary works |
Perform safety checks on all equipment. Test power tools, inspect hired machinery for damage, and ensure everything operates safely. Check that your team knows how to use each piece of equipment correctly.
Gathering everything beforehand eliminates frustrating delays and keeps your project on schedule and within budget.
Confirm you have adequate storage space on site for materials, and position them away from your excavation area. This keeps materials safe and creates a clear workspace.
Pro tip: Order materials 1-2 weeks before your start date to ensure delivery arrives on time, and arrange them by installation sequence so first-needed items are most accessible.
Step 3: Install drainage infrastructure efficiently
Now comes the core work: installing your drainage system according to plan. This step transforms your preparations into a functioning system that will protect your property for years to come.
Begin by establishing proper grades and slopes. Water flows downhill by gravity, so your pipes must slope continuously toward the outlet or inspection chamber. Even slight errors in slope compound over distance, causing water to pool rather than drain. Use a level and measure carefully at regular intervals to maintain the correct gradient throughout.
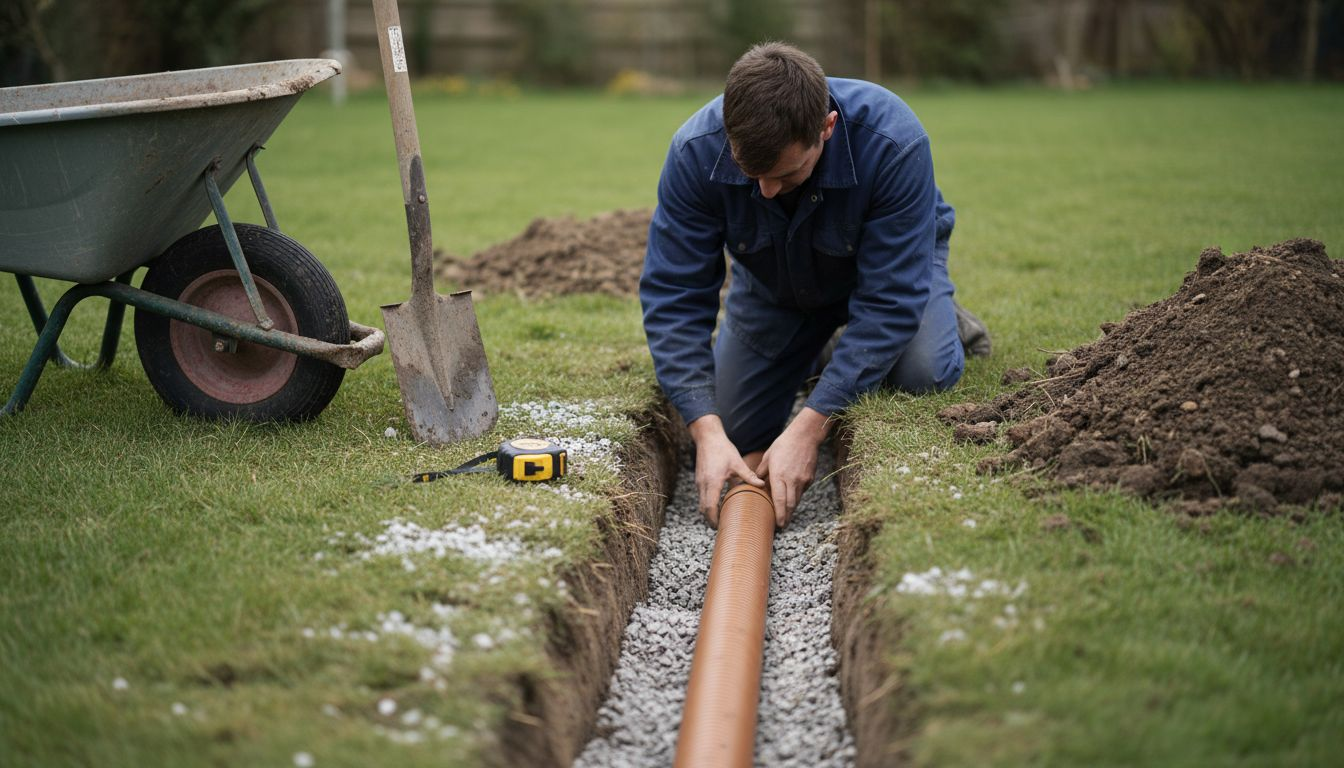
Start excavation at the outlet point and work backwards toward the source. This approach prevents water from pooling in completed trenches whilst you continue digging. Keep trenches at the correct width and depth per your design specifications to accommodate pipes and bedding materials safely.
Install pipes and connectors carefully. Proper pipe placement and secure joining prevents leaks and blockages that could compromise your entire system. Lay pipes on a prepared bed of gravel or sand, ensuring they sit firmly without rocking. Use appropriate jointing methods for your pipe material, whether that’s solvent cement, rubber seals, or mechanical couplings.
Key installation steps include:
- Laying bedding material to support pipes evenly
- Positioning pipes at correct slope and alignment
- Joining pipes using specified methods and materials
- Maintaining access points for future maintenance
- Installing catch basins and outlets at designated locations
- Applying sustainable drainage principles where surface water is managed environmentally
Back-fill trenches carefully once pipes are installed and tested. Use unsuitable material such as large stones or clay that could damage pipes or restrict drainage. Layer back-fill material appropriately and compact gently to avoid settling that might disturb your installed pipes.
Test the system before covering everything permanently. Run water through the system to check for leaks, blockages, or poor flow. Any problems discovered now are far cheaper to fix than discovering them after the project is signed off.
Proper installation today prevents expensive repairs and property damage tomorrow.
Once testing passes, complete your landscaping and restoration work to leave the site neat and usable.
Pro tip: Take photographs and measurements of your installed pipes before back-filling, documenting exact locations for future reference if you ever need repairs or modifications.
Step 4: Verify performance with thorough testing
Your drainage system is installed, but before you declare the project complete, you need to verify it actually works as designed. Testing catches problems now rather than leaving you with a failed system when heavy rain arrives.
Begin with a visual inspection of all components. Walk the entire route of your drainage system, checking that pipes are positioned correctly, joints are properly sealed, and there are no obvious damage or misalignment. Look for any debris inside pipes or areas where soil has collapsed into trenches during back-filling.
Perform water tests to verify flow and drainage. Start with a simple test: run water through the system and observe how quickly it drains from your property. Watch for water backing up, pooling, or emerging from unexpected locations. Any of these signs indicates a problem requiring correction before final sign-off.
Conduct standardised pressure tests if required by building control. Air and water pressure tests simulate operational conditions and detect leaks that visual inspection might miss. These tests verify system integrity and ensure all joints are watertight under load.
Key testing procedures include:
- Visual inspection of all pipes, joints, and components
- Water run tests to verify drainage speed and direction
- Pressure tests to identify leaks under operational stress
- Flow rate measurements to confirm design capacity
- Checking inspection chambers and access points for proper function
Verify your system meets performance criteria including flow rates and storage capacity as specified in your design. Document all test results with measurements, times, and observations. This documentation proves compliance and becomes your baseline for future maintenance comparisons.
Address any failures immediately. If tests reveal blockages, leaks, or poor flow, investigate the cause and correct it before proceeding. Common issues include inadequate slope, debris in pipes, or joint failures that all require fixing.
Testing now prevents costly emergency repairs and property damage later when your system fails under real-world conditions.
Once all tests pass, obtain sign-off from your building control inspector and any other required authorities.
Pro tip: Keep detailed test records including photographs, measurements, and inspection chamber observations as your maintenance baseline, making it easier to spot problems in future inspections.
Step 5: Complete finishing touches and clean up
Your drainage system is tested and approved. Now it’s time to restore your site, tidy up the mess, and leave everything looking finished. This final step transforms a construction site back into a usable property.
Begin by removing all excess materials and debris from the site. Collect leftover pipes, packaging, tools, and soil piles that accumulated during installation. Hire a skip if necessary to haul away large quantities of waste, or arrange for a waste collection service to remove materials responsibly.
Start back-filling and compacting trenches systematically. Use suitable soil or engineered material in layers, compacting each layer gently to avoid disturbing your installed pipes. This prevents future settling that could crack pipes or create depressions that pond water.
Re-grade surfaces to restore proper water flow away from buildings and structures. Landscape restoration ensures water flows correctly and prevents erosion across your property. Slope surfaces slightly away from foundations and towards your new drainage system to direct water properly.
Restore vegetation and landscaping features. Replace turf, plant shrubs, or restore garden beds that were disturbed during installation. This isn’t purely cosmetic—good vegetation cover prevents soil erosion and helps stabilise the ground around your drainage system.
Finishing tasks include:
- Removing all construction waste and temporary materials
- Back-filling trenches in layers with proper compaction
- Re-grading surfaces for correct water flow direction
- Replacing turf, sod, or vegetation as required
- Ensuring all inspection chambers and covers are properly aligned
- Cleaning inspection chambers of any debris or sediment
Verify that all visible components align with design specifications and are secure against environmental exposure. Check that inspection chamber covers operate smoothly and sit flush with the ground surface. Confirm that no pipes or connections are visibly exposed.
Conduct a final site walk-through with your building control inspector if required. Address any outstanding issues before they sign off the project as complete. This formal approval confirms your system meets all regulatory requirements.
Proper finishing work protects your investment and prevents future maintenance headaches caused by exposure or instability.
Document your completed project with photographs showing the finished landscape and any visible components for your property records.
Pro tip: Create a site map showing the exact location of all buried pipes, inspection chambers, and key components, then keep this document safely for future reference when planning extensions or repairs.
Ensure Your Drainage System Installation Meets Every Critical Standard
Understanding how to correctly plan and install a drainage system can be complex, with vital steps like site compliance, material selection, accurate installation, and thorough testing all demanding your attention. The risk of costly failures or regulatory issues can feel overwhelming. You want a reliable solution that not only complies with local regulations but also guarantees long-term performance and protects your property from flooding or damage.
At Local Services Drainage, we specialise in delivering trustworthy drainage solutions tailored for Southern England. Our experienced team utilises advanced technology such as CCTV surveys to thoroughly assess your site conditions before work begins. We follow the professional workflow outlined in best practice guides ensuring every pipe is installed with the correct slopes and materials. Whether it is a new installation or urgent repairs, we provide comprehensive support with guaranteed quality and quick response times.
Take control of your property’s drainage with expert assistance you can trust.

Contact us now at Local Services Drainage to schedule your consultation or book an inspection. Don’t wait until problems arise; ensuring your drainage installation is done right today saves you time, expense, and worry tomorrow.
Frequently Asked Questions
What steps should I follow for a successful drainage system installation?
To ensure a successful drainage system installation, follow these steps: assess site requirements and compliance, prepare the area and gather essential materials, install the drainage infrastructure efficiently, verify performance with thorough testing, and complete finishing touches and clean up. Begin by checking local regulations and securing necessary permits to avoid legal issues later.
How do I determine the necessary compliance requirements for my drainage project?
Identify your property’s regulatory obligations by consulting local authority guidelines and environmental zones that may affect your project’s design. Gather information regarding flood risk designations and required building regulations, and consult your local building control office early for specific requirements and documentation needed.
What materials do I need for installing a drainage system?
Essential materials for a drainage system typically include drainage pipes, connectors, bedding material like gravel or sand, sealing compounds, and inspection chamber components. Gather all required materials before starting to prevent delays and ensure a smooth installation process.
How can I ensure that my drainage pipes are installed correctly?
Ensure proper installation of your drainage pipes by establishing the correct grades and slopes to facilitate water flow downhill by gravity. Use a level and measure regularly as you lay pipes and connectors, verifying that they are secured properly to prevent leaks and blockages.
What testing procedures should I conduct after the drainage system installation?
After installation, perform visual inspections of all components and conduct water tests to verify flow and drainage efficiency. Consider standardised pressure tests to detect leaks that may not be visible, and document all findings to ensure compliance and facilitate future maintenance.
How can I effectively clean up and restore the site after installation?
To clean up after installation, remove all excess materials and debris, back-fill and compact trenches carefully, and restore the landscape by re-grading surfaces to direct water flow appropriately. Document the completed site with photographs and a map of buried components for future reference.